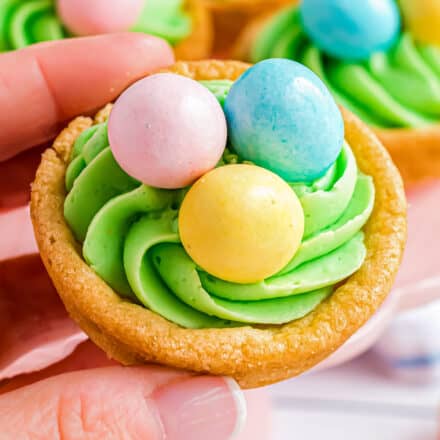
These Sugar Cookie Cups are made with pre-made dough baked in muffin pans, then pressed down to create a cup. Filled with a silky buttercream frosting, these sweet and chewy cookie cups are then topped with Easter/Spring candies to make a fun and festive Spring dessert!
This is one of my Holiday Dessert recipes I know you’ll want to keep on hand!
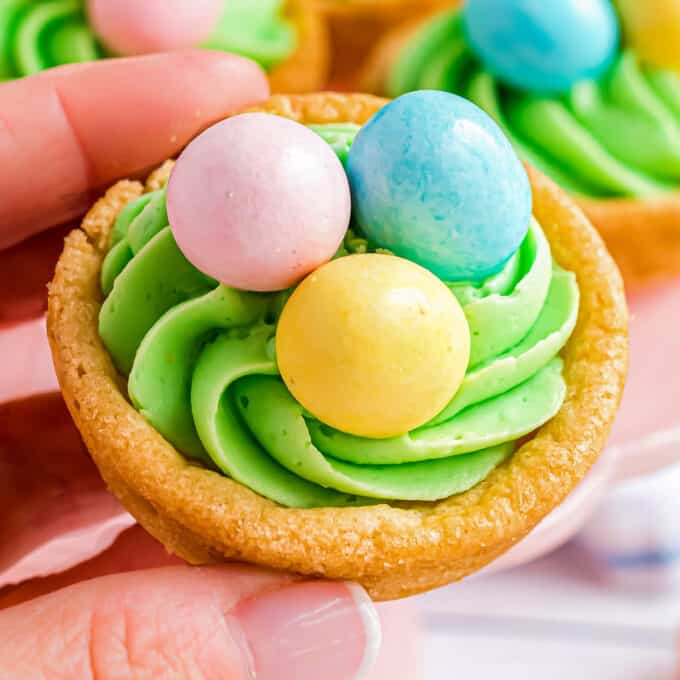
Can you believe that Easter is going to be here in a short 2 1/2 weeks? Even though it’s later this year, it seems like it’s crept up on us.
So if you’re like me, and struggling to pull together a fun Easter for your family, these sugar cookie cups are a great idea!
Not only are they delicious and absolutely adorable, they’re also semi-homemade, which takes a lot of the pressure off of you.
This recipe uses the sugar cookie dough that’s pre-made and already cut up into square portions. I use Pillsbury brand (this is the one), and then all you have to do is whip up a quick buttercream frosting and add some Easter candy.
And you can make it even easier by using store-bought frosting!
How to make Easter basket sugar cookie cups?
This is just an overview; the full ingredients and directions are in the recipe card toward the bottom of this post.
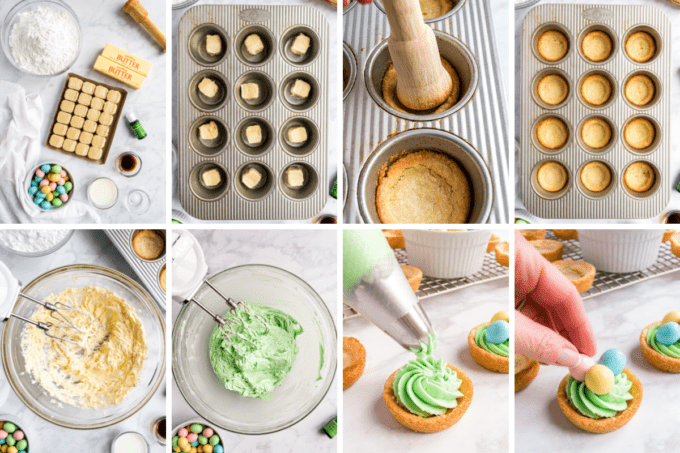
- Bake cookies. Adding the cubes of cookie dough to the muffin pan keeps them in a nice round shape.
- Press down. This can be done with a special tool (like a tart stamper), the bottom of a shot glass, a small spice jar, etc.
- Let cool. It’s important to let the cookie cups cool completely before decorating.
- Make frosting. I find it’s best to use a hand mixer or stand mixer for this.
- Add food coloring. This is optional, but fun!
- Pipe. Feel free to use your favorite decorating tip.
- Decorate. Any Easter or Spring-themed candy will work.
Helpful Tip!
When pressing down on the baked cookies, make sure you press gently and slowly. If you press too hard, or too deep, the cookie may crack a lot or fall apart. However, a few cracks are normal, and will be covered by the frosting.

Variations of this recipe
- Frosting color – I chose the green color to look like green grass in an Easter basket, but feel free to use a color you love.
- Frosting type – this recipe uses a classic buttercream frosting, as it’s easy to make, but if you prefer a different type of frosting, feel free to use it. You can also use a store-bought frosting if you’d like!
- Cream – instead of milk in the frosting, you can use heavy cream or half and half if you’d prefer.
- Piping tip – if you have a piping tip that looks like grass (this is one from Wilton), that would be another frosting option.
- Decorations – these are designed to look like Easter baskets, so I chose the chocolate candy eggs that are readily available in the Spring. However you can use any candy or sprinkles that you’d like.

FAQ’s
Not at all. If you have one, and feel like using it, please feel free, but you certainly don’t have to. In place of the piping tip/bag, you could add the frosting to a resealable plastic bag (like a Ziploc), cut the corner off at an angle, and use that to pipe the frosting on.
In an effort to make this recipe quick and easy, I tested this recipe using store-bought sugar cookie dough. I didn’t test this recipe using homemade sugar cookie dough, or other types of sugar cookie dough (like the bags of mix), but if you’d like to experiment, please feel free to do so!
Making sugar cookie cups ahead of time
You can absolutely make the components of this dessert ahead of time! The cookie cups can be baked, cooled, and stored at room temperature (in an airtight container) for up to about a week.
The frosting can be made and kept refrigerated (in an airtight container) for up to about a week as well. Before frosting the cookie cups, beat the frosting for a minute or two until fluffy.
You can also make these cups entirely ahead of time, including decorating, but I wouldn’t do that for more than a day or two.

Storage
Leftover frosted cookie cups should be stored in an airtight container, and enjoyed within 3 days (at room temperature), or 4 days (in the refrigerator).
Cookie cups that aren’t frosted can be stored in an airtight container at room temperature for up to a week.
Freezing
If you’d like longer storage, you can freeze the unfrosted cookie cups for up to 3 months.
Thaw before frosting and assembling.
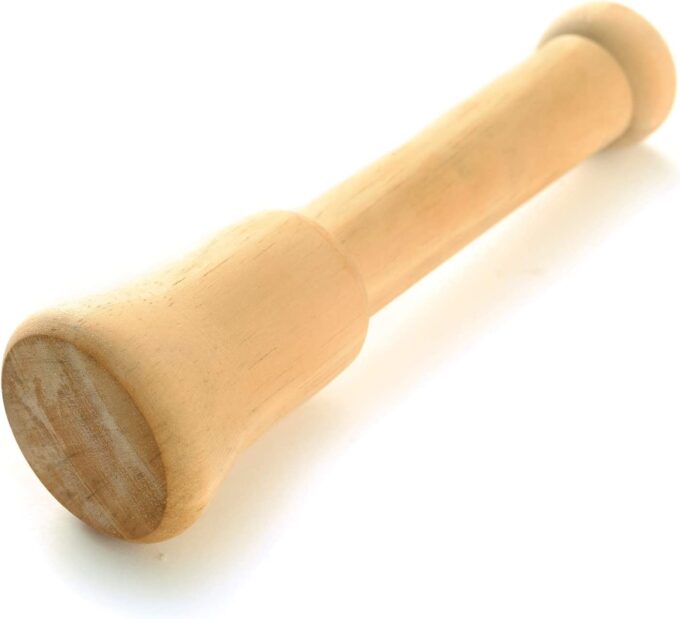
My Favorite Tart Stamper!
This is the perfect tool to press down the centers of these cookie cups, but also to make thumbprint cookies, or to smooth out a pie crust in the pan, etc.
Did you make this? Be sure to leave a review below and tag me @the_chunky_chef on Facebook and Instagram!
Ingredients
- 16 oz package refrigerated "ready to bake" sugar cookie dough the kind that comes in 24 square pieces
- 1 cup unsalted butter softened
- 3 cups powdered sugar
- 1 tsp vanilla extract
- 1/4 tsp kosher salt
- 1 – 2 Tbsp whole milk
- food coloring optional
- Hershey's egg candies or similar Easter/Spring themed candy
Instructions
Make the cookies
- Preheat oven to 350°F and spray two regular-sized muffin pans with baking spray.
- Place one square of sugar cookie dough in each well of the muffin pans.
- Bake for 10-14 minutes (according to package instructions), until lightly browned.
- Remove from the oven and immediately use a tart stamper, bottom of a shot glass, bottom of a small spice jar, etc, to lightly and slowly press the centers of the cookies down. This creates a small indentation for the frosting.
- Let the cookie cups cool in the muffin pans for about 5 minutes, then carefully remove to a wire cooling rack, and let cool completely.
Make the frosting
- In a large mixing bowl, add butter and beat with a hand mixer (or use a stand mixer) on medium speed until butter is light and pale in color, about 2 minutes.
- Add powdered sugar, one cup at a time, beating on low until all the sugar has been added.
- Increase mixer speed to medium, beating until fully combined. Beat in vanilla extract and salt.
- Add 1 Tbsp of milk and continue to beat, adding more milk until desired consistency is reached. Beat for another 2 minutes, until light and fluffy.
- If using food coloring, add a drop at a time while beating, until the frosting is the color you want.
Assemble
- Add frosting to piping bag with desired tip (or a plastic bag). Pipe frosting onto cooled cookie cups, then top with candy.
Want to save this recipe for later? Click the heart in the bottom right corner to save to your own recipe box!
Chef Tips
- Recipe makes 24 cookie cups.
- Store-bought frosting can also be used to save time.
Nutrition Disclaimer
The Chunky Chef is not a dietician or nutritionist, and any nutritional information shared is an estimate. If calorie count and other nutritional values are important to you, we recommend running the ingredients through whichever online nutritional calculator you prefer. Calories can vary quite a bit depending on which brands were used.




Catalina says
How cute these cups are! Such a festive and delicious Easter treat!
Sandra says
These are so cute and so perfect for Easter!! Such a fun treat! Thank you!
Erin says
Looks festive and impossible to resist! You had me on this!
Beth says
Easy, delicious, and adorable? Does it get any better?! No. The answer is no. These are great!
Peggy says
I haven’t made this yet but your recipes are always so tasty & doable so I know they will be good! Thanks so much