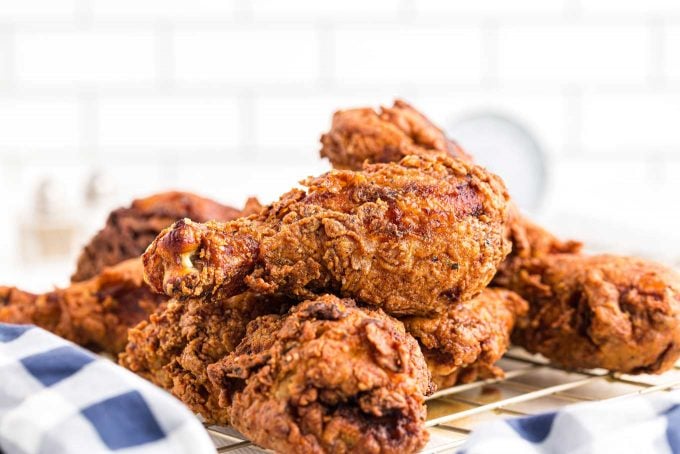
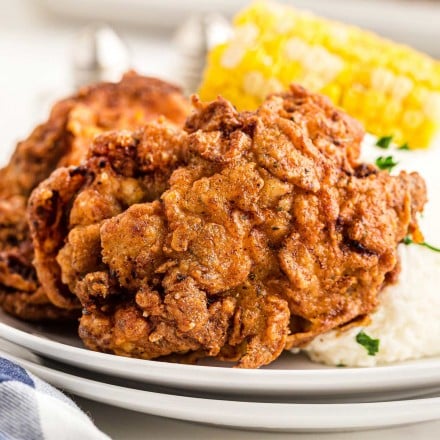
This Classic Buttermilk Fried Chicken recipe is incredibly flavorful and juicy, from a hot sauce/buttermilk marinade and a seasoned flour dredge. Soon to be your family’s new favorite chicken recipe!
This Classic Buttermilk Fried Chicken recipe is our favorite recipe for perfectly crispy chicken! We love our own little twists on classic comfort food, like our French Onion Baked Chicken, and Chicken Marsala. This is one of my Chicken Recipes you’ll definitely want in your recipe box!
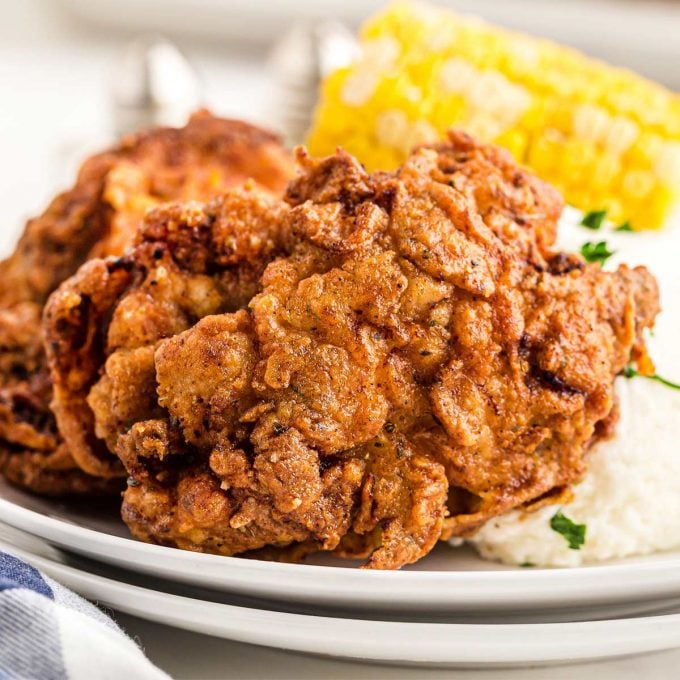
BUTTERMILK FRIED CHICKEN RECIPE
Whenever we get the hankering for some great fried chicken, we usually have to grab some takeout. But no more!
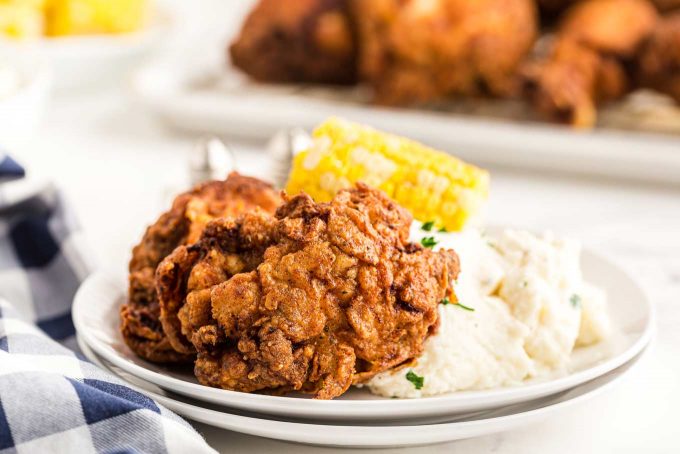
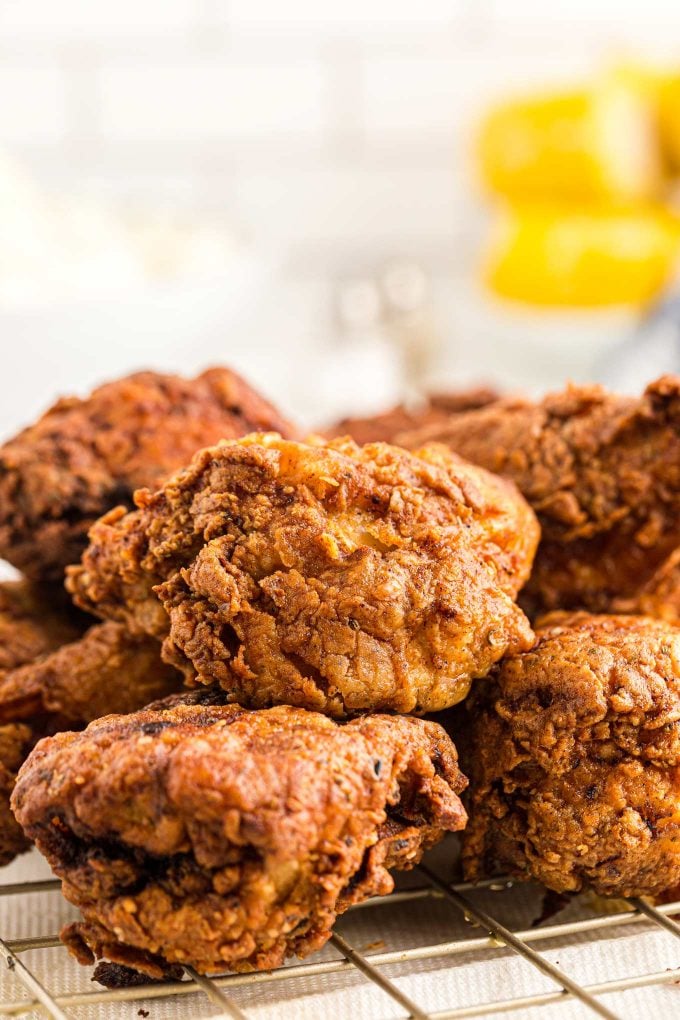
Not much makes my mouth water more than a big, juicy piece of perfectly cooked fried chicken. That mouthwateringly crunchy outside and tender yet flavorful inside. Perfect with some corn on the cob and potato salad.
This recipe is great to make not only for family dinner, but for a potluck or cookout. It’s truly a crowd-pleaser!
The secret is three-fold:
- The marinade – soaking the chicken in a seasoned buttermilk mixture imparts not only great flavor, but great texture. It tenderizes the chicken and skin, plus allows for the flour to really stick to the chicken.
- The flour – regular salt and pepper are great, but to really kick up the flavor, we use a super seasoned flour. No bland chicken here folks! I took my seasoned flour recipe from my Applebee’s Copycat Honey Pepper Chicken and Mac and Cheese, and it works great here!
- The fry – frying the chicken at the right temperature ensures a perfectly cooked piece of chicken, and a crispy, crunchy outside. Too low of a temperature and the chicken could end up taking on too much oil and end up greasy. Too high of a temperature and the chicken will brown too quickly, leaving the inside potentially raw.
So let’s get to frying… it’s not as difficult as you may think!
HOW TO MAKE BUTTERMILK FRIED CHICKEN
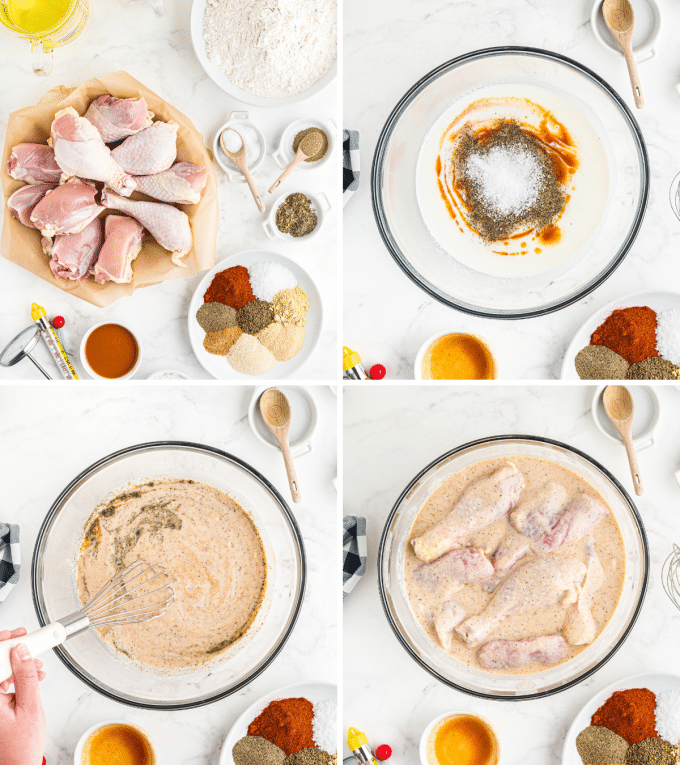
- Mix marinade. Use a bowl that’s big enough to hold both the marinade and all the chicken pieces.
- Add chicken. Turn to coat it well, then cover and refrigerate.
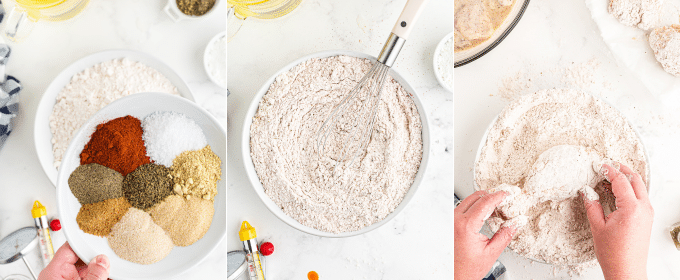
- Make seasoned flour. Add the flour to a shallow bowl, resealable plastic bag, or paper bag and mix with all the seasonings. It’ll look like a lot, but it’s not too much, I promise.
- Coat chicken in flour. Shake off excess buttermilk, coat well in flour, then shake off excess.
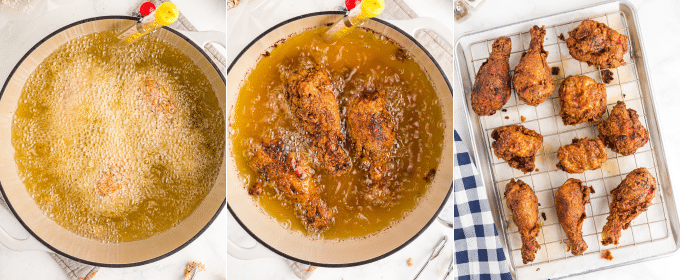
- Add chicken to oil. Carefully drop chicken, away from you so you avoid splatters, about 3 pieces at a time, so you don’t overcrowd the pot.
- Fry chicken. Fry chicken 14-16 minutes, turning chicken over ever few minutes. Chicken is done when it reaches an internal temperature of at least 165 F degrees.
- Let chicken cool. Remove chicken from oil and place on a wire cooling rack. This keeps the chicken crispy as it cools. Let it rest 5-10 minutes, then eat.
ADDITIONAL COOKING TIPS
- OIL TYPE – when frying chicken you want to use an oil that has a high-smoke point, like vegetable or canola oil, meaning it can be cooked at higher temperatures without burning. Peanut oil is actually my preferred oil, since it imparts a subtle classic flavor.
- KEEPING THE BREADING ON – there’s nothing more frustrating than picking up a perfectly crispy piece of fried chicken and having chunks of the breading fall off! There are a few tips to help keep that breading on the chicken. Make sure to shake off the excess flour/buttermilk when breading. Don’t overcrowd your pot, otherwise the chicken will float around and bump into each other. And lastly, try to only flip your chicken once. The less you handle it, the better the breading will stick.
- TAKE THE CHICKEN’S TEMPERATURE – the key to knowing when your chicken is cooked through and safe to eat, is using a meat thermometer. I’ve linked my two favorites down below, but you absolutely don’t have to spend a ton of money to get a quality thermometer. While the chicken breasts are safe at 165°, some cuts of chicken (like the drumsticks) actually taste better when they are cooked closer to 180°F because they’ll become more tender at that point.
VARIATIONS OF THIS RECIPE
- OVEN – to save some calories, you can make oven-fried chicken with this recipe. Bake at 425°F on a parchment paper lined baking sheet, leaving some room between each piece. Spray generously with nonstick cooking spray and bake for 30 minutes, flip over, spray again and bake another 25 minutes or so.
- AIR FRYER – preheat air fryer to 375°F. Add chicken to air fryer in a single layer and spray generously with nonstick cooking spray. Cook for 15 minutes, then flip chicken and spray the other side. Cook another 15 minutes, then cook for approximately 10 more minutes, until chicken is golden brown and has an internal temperature of at least 165°F.
- SPICY – feel free to add additional hot sauce to the buttermilk marinade, and cayenne pepper to the flour mixture.
- BONELESS SKINLESS – to get the best crunchy coating, I use bone-in skin-on chicken. But if you prefer, you can use boneless skinless chicken.
- CHICKEN TYPE – normally I use thighs and drumsticks due to their smaller size, but bone-in skin-on chicken breasts will work as well, they’ll just need a longer cooking time.
MAKING FRIED CHICKEN AHEAD OF TIME
I don’t recommend making this buttermilk fried chicken ahead of time, as the skin just won’t be as deliciously crispy as it is when it’s made fresh.
However, due to the nature of the recipe, you have to marinate the chicken ahead of time 🙂 You can mix together the seasoned flour ahead of time as well.
I always like to prep ahead for a stress-free dinner time!
STORAGE
Leftover fried chicken should be refrigerated in an airtight container and consumed within 2-3 days.
For best results, fried chicken should be reheated in a 350°F oven for 15-20 minutes.
SPECIAL EQUIPMENT FOR THIS RECIPE
The following links are affiliate links.
The Chunky Chef, LLC is a participant in the Amazon Services LLC Associates Program, an affiliate advertising program designed to provide a means for sites to earn advertising fees by advertising and linking to amazon.com. For more information regarding this program and what it means for you, please see my Privacy page.
- Dutch Oven – perfect for frying, making soups, dutch oven breads, etc.
- Frying Thermometer – inexpensive, and takes all the guesswork out of maintaining the right frying temperature!
- Spider Strainer – I use this every time I fry anything, it works so well to remove the chicken from the oil.
BE SURE TO SCROLL DOWN TO CHECK OUT OTHER READERS’ COMMENTS FOR TIPS AND REVIEWS.
AND DON’T FORGET, IF YOU’VE MADE THIS RECIPE, LEAVE A COMMENT AND PLEASE GIVE IT A STAR RATING LETTING ME KNOW HOW YOU ENJOYED IT!
Did you make this? Be sure to leave a review below and tag me @the_chunky_chef on Facebook and Instagram!
Ingredients
- 1 quart vegetable, canola, or peanut oil for frying
BUTTERMILK MARINADE
- 3 cups buttermilk
- 1/4 cup hot sauce (optional but recommended)
- 1 1/2 tsp kosher salt
- 1 tsp black pepper
- 10 pieces raw bone-in, skin-on chicken (I prefer to use thighs and drumsticks)
SEASONED FLOUR
- 3 cups all purpose flour
- 1/3 cup cornstarch
- 2 Tbsp paprika
- 1 Tbsp kosher salt
- 1 Tbsp dry mustard
- 1 Tbsp garlic powder
- 1 Tbsp onion powder
- 1/2 Tbsp seasoned salt
- 1/2 Tbsp black pepper
- 2 tsp celery seed
- 1/2 tsp dried thyme
- 1/2 tsp dried basil
- 1/2 tsp dried oregano
Instructions
MAKE BUTTERMILK MARINADE
- To a very large mixing bowl, add buttermilk, hot sauce, salt, and pepper, and whisk to combine. Add chicken and turn to coat. Cover with plastic wrap and refrigerate 4 hours (or up to overnight).
PREPARE FOR FRYING
- After chicken has marinated, add oil to heavy bottomed skillet or dutch oven until it’s about 1-2 inches deep. Heat oil to 350°F.
- Line a plate with wax paper and set aside. Line a baking sheet with paper towels and top with a wire cooling rack. Set aside.
MAKE SEASONED FLOUR AND DREDGE
- Combine all seasoned flour ingredients in a large shallow bowl (or gallon sized resealable bag/paper bag), and whisk to combine it well.
- Remove chicken piece from buttermilk marinade, shaking to remove excess marinade. Add to seasoned flour mixture, coating well. Shake gently to remove excess flour.
- Add breaded chicken piece to a wax paper lined plate and continue with 2-3 more pieces of chicken.
FRY CHICKEN
- Fry chicken, 3-4 pieces at a time, in 350°F oil. Keep in mind, adding the chicken will drop the oil temperature, so you’ll need to adjust the stovetop temperature to keep the oil as close to 350°F as you can.
- Fry chicken 14-16 minutes, turning chicken over ever few minutes. Chicken is done when it reaches an internal temperature of at least 165 F degrees.
- Remove chicken pieces from oil and place on the prepared wire rack/baking sheet. Let chicken rest 5-10 minutes before serving.
Want to save this recipe for later? Click the heart in the bottom right corner to save to your own recipe box!
Chef Tips
- Cooking time does not include marinating time, as this will vary from individual to individual.
- Cooking time also does not include the time to fry additional batches of chicken.
Nutrition Disclaimer
The Chunky Chef is not a dietician or nutritionist, and any nutritional information shared is an estimate. If calorie count and other nutritional values are important to you, we recommend running the ingredients through whichever online nutritional calculator you prefer. Calories can vary quite a bit depending on which brands were used.


Jean says
I made this (without the mustard powder, I didn’t have it) and it was wonderful. I used boneless skinless thighs, I find the ones with bones etc. come out to brown and intimidates me. I am rather a novice at fried chicken but this was the best recipe I have come across. My family loved it. I don’t leave many reviews but yours warrants it. Thank you.
Greg says
I’ve made this before and it was great but I want to try to kick it up a notch if I can.
Would you recommend adding Accent or MSG to the breading mix or just sprinkle over the top after cooking? I have seen either way recommended but am unsure how to tweak this…
The Chunky Chef says
I haven’t tested using msg in this recipe, so I can’t say which way would work best. My gut says to add it to the breading mix though.
Karl says
I have a question, After dredging chicken in flour mixture do you let it sit on the counter for a while to let flour adhere before putting in hot oil?
The Chunky Chef says
I don’t, but you’re certainly welcome to tweak this recipe if you’d like.
Lore says
Although we can only eat it about once a month, my husband and I love fried chicken so have always had an eye out for a new recipe that has a seasoning or unique twist to any I’ve tried. Having used yours, I’m done looking. We both agreed within minutes that this is the best fried chicken we’ve ever tasted. Whether prepared in our kitchen, at someone else’s home or by a professional chef…this one wins, hands down. I used all of the ingredients and prepared exactly as instructed using boneless skinless chicken breasts evenly pounded out to about 1/2 inch thickness and fried 4-5 minutes on each side at same temp in instructions. It’s fabulous!
Kathy says
Made this for dinner and it was a hit! Used chicken tenders and my kids even ate it without ketchup! Will definitely be making this again. Thanks!
Jessica says
Did your recipe for fried chicken used to say something about dropping buttermilk into to flour prior to coating to make it extra crispy. I swear I used the white gravy recipe before and linked to your fried chicken recipe from there and it said that but now I can’t find that anywhere
The Chunky Chef says
That was an older recipe that I’m revamping for 2022, for paprika buttermilk chicken tenders. But yes, once you make the seasoned flour, you can drizzle some extra buttermilk in there and stir it around with a fork to make little crumbles 🙂
Joseph says
would this have the same crunchiness/crispiness if it was air fried instead of deep fried
The Chunky Chef says
I’ve only tested this recipe as written, not in an air fryer. So without testing and retesting it myself, I can’t say for certain if that would work. If you try it, I’d love to know how it turns out!
Sara Welch says
Served this for dinner last night and it was a hit all around the table; the whole family loved it! Delicious!
Cathy says
This looks so perfectly crispy! Can’t wait to try it!
Toni Dash says
This quickly became a favorite at my house! Everyone loved it!
Catalina says
You just gave me a delicious dinner idea for tonight! Sounds so good!
Vikki says
This is amazingly tasty! Classic fried chicken
Erin | Dinners,Dishes and Dessert says
This Classic Buttermilk Fried Chicken looks absolutely delicious! Yummy!
Pam B says
Can I use this same process with pork chops?
The Chunky Chef says
I haven’t tested this recipe using pork chops, so I can’t say for certain whether any changes would need to be made, or how well it would work out. If you do some experimenting, I’d love to know how it goes 🙂
Beth says
Yummy! These look so delicious and tasty! I can’t wait to give these a try!