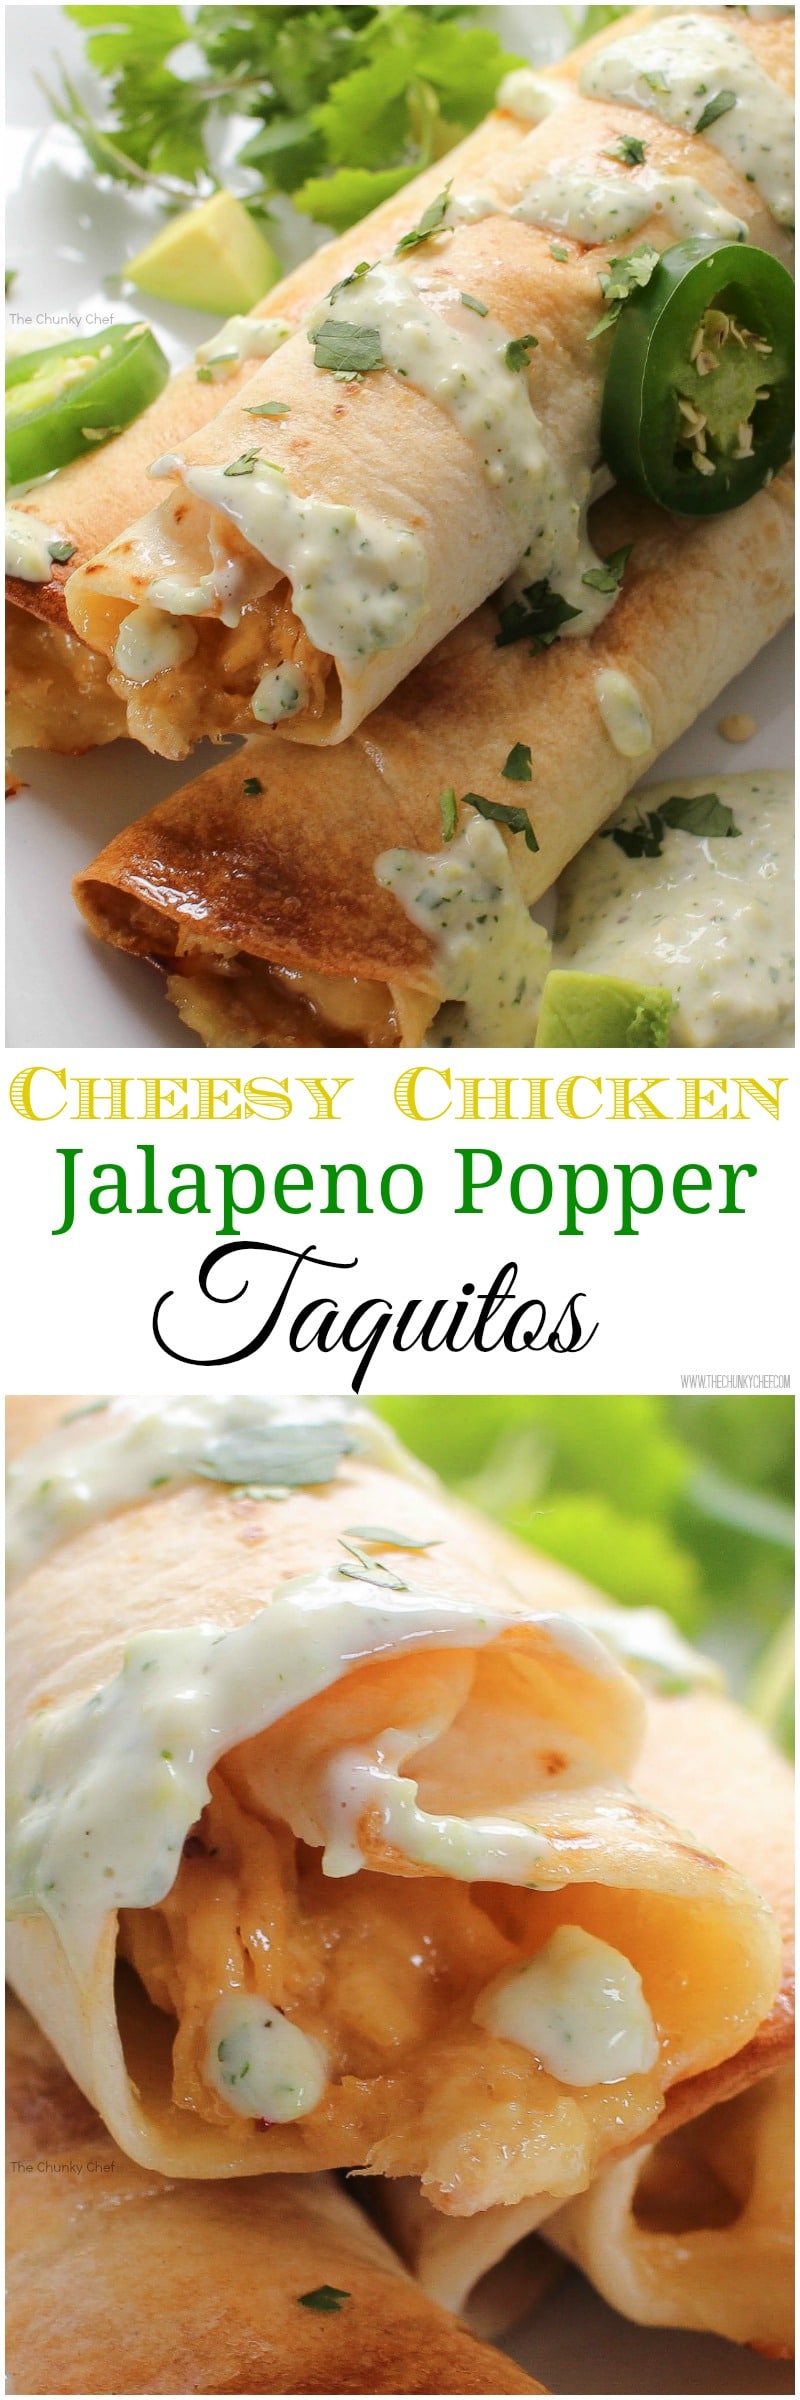
These Jalapeño Popper Chicken Taquitos are the perfect crowd-pleasing appetizer, or fun main course! Creamy jalapeño studded chicken filling is rolled up with cheese in flour tortillas and baked until crispy. Serve with an easy avocado-cilantro ranch and watch them disappear!
This is one of my Chicken recipes I know you’ll want to keep on hand!

Don’t you just love jalapeño poppers? The combination of spicy peppers, and creamy cheesiness is just irresistible!
This recipe takes all the amazing flavors of a classic jalapeño popper, and wraps them up with gooey cheese inside a crispy baked tortilla shell. Plus, you get the added bonus of a drizzle of a simple 4 ingredient avocado cilantro ranch dressing!
Instead of having to work over a skillet of hot oil, these taquitos are baked. I know, most things that are baked instead of fried really aren’t as crispy and amazing as the fried version… but these taquitos are.
They’re perfectly crisp and golden brown, can be prepped ahead, and the filling can even be frozen… making these the perfect simple appetizer or fun dinner idea!
This recipe has been live on the site since early 2015, and while I’ve updated the photos and shared more tips and tricks, the recipe itself is unchanged (aside from a couple optional added ingredients).
How to make jalapeño popper chicken taquitos?
This is just an overview; the full ingredients and directions are in the recipe card toward the bottom of this post.
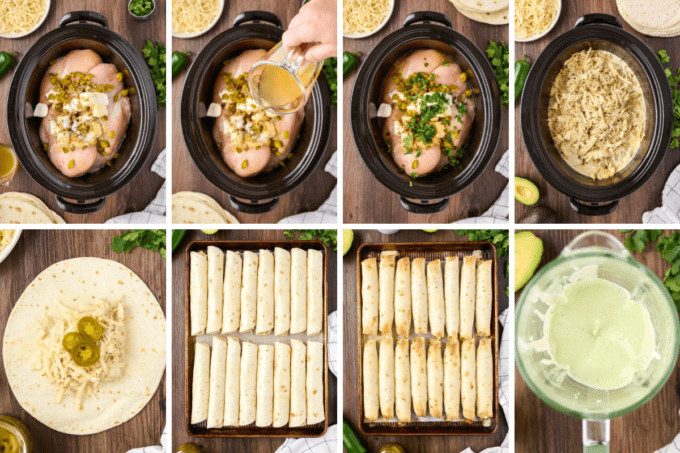
- Slow cook chicken.
- Assemble taquitos. I find microwaving the tortillas a little first helps them be more pliable and you’ll have less breakage when rolling.
- Bake.
- Make ranch sauce. I like to use my blender or food processor for this, so it’s really nice and smooth.
- Serve. Serve hot, drizzled with the ranch sauce (or have it on the side for dipping).
Helpful Tip!
At first glance, this recipe looks complicated as it has several steps. However, two of those steps can be made ahead of time (the filling can be made and stored, and the avocado cilantro ranch can be made and stored). This means you can have dinner on the table in about 20-30 minutes!

Variations of this recipe
- Jalapeños – we love using pickled (jarred) jalapeños for this recipe, but you can substitute fresh peppers if you’d like. Just know this will increase the spiciness level.
- Cheese type – this recipe uses Monterey jack cheese, but feel free to use your favorite shredded cheese (cheddar and Pepper jack are great options).
- Tortillas – my family really likes these when they’re made with flour tortillas, but if you like corn tortillas instead, feel free to use them in this recipe.
- Fried – if you’d like to fry these taquitos, please see the frying directions down in the “Chef Tips” section right below the recipe card.
- Air fryer – if you’d like to make these taquitos in an air fryer, please see the air fryer directions down in the “Chef Tips” section right below the recipe card.

FAQ’s
In this recipe, since the taquitos are baked, you just place them seam side down on the baking sheet. If you’re frying them, you can mix up a mixture of half water, half beaten egg and brush that on the last part of the tortilla before you finish rolling. This seals the seam, and they should stay together during the frying process.
I’ve seen the names used interchangeably, but from my research it seems it really comes down to the type of tortilla used. Traditionally, taquitos are made with corn tortillas, while flautas are made with flour tortillas. However, I use flour tortillas for this recipe because that’s what my family likes and prefers, but feel free to use whichever type of tortilla you like best.
Making chicken taquitos ahead of time
Unfortunately I don’t recommend making the taquitos entirely ahead of time, since they lose their crispiness. I also don’t recommend assembling them ahead of time, since they get soggy.
However, you can absolutely make the filling ahead of time. Just mix it up, cover it and refrigerate for up to 2 days.
Then when you want to make the taquitos, half the work is done for you!

Freezing
You can freeze the assembled taquitos, or you can freeze the filling.
To freeze the assembled taquitos:
- Add taquitos to a wax paper or parchment paper lined baking sheet.
- Freeze the whole baking sheet for about an hour or two, until taquitos are frozen solid.
- Transfer frozen taquitos to a freezer-safe container and freeze for up to 3 months.
To freeze the filling:
- Transfer filling to freezer-safe container and freeze for up to 3 months.
Storage
Leftover taquitos should be refrigerated in an airtight container and eaten within 3 days.
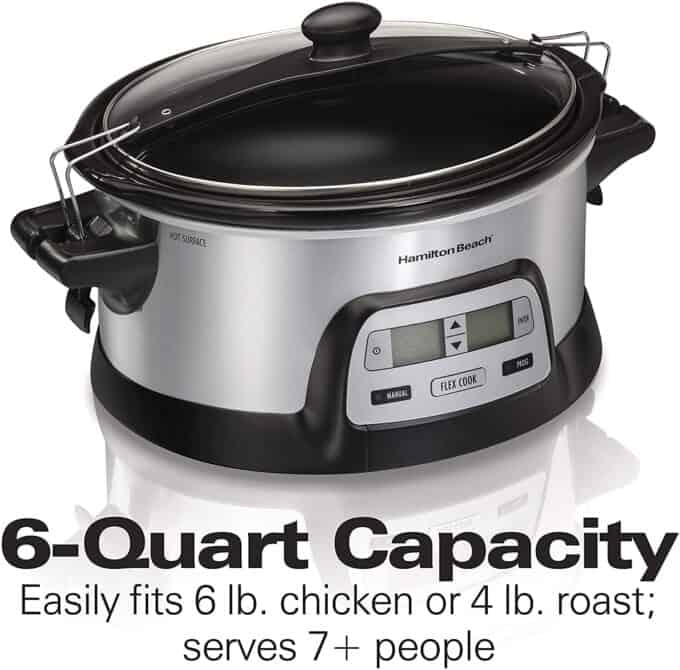
My Favorite Slow Cooker!
I had this crockpot for a while now, and I really love how it cooks. The locking lid feature is amazing for taking foods to potlucks or other gatherings!
Did you make this? Be sure to leave a review below and tag me @the_chunky_chef on Facebook and Instagram!
Ingredients
Chicken taquitos
- 3-4 boneless skinless chicken breasts
- 1/2 cup reduced sodium chicken broth
- 8 oz cream cheese full fat works best
- 1/3 cup pickled or jarred sliced jalapeños roughly chopped
- 1 tsp garlic powder
- 1 tsp kosher salt
- 1 tsp ground cumin
- 1/4 cup chopped fresh cilantro optional
- 16 soft taco-sized flour tortillas
- 1 1/2 cups shredded Monterey jack cheese or use your favorite
- additional jalapeño slices optional – to add to the rolled up taquitos
Avocado Cilantro Ranch
- 1 medium avocado pitted and chopped
- handful fresh cilantro about 1 cup
- 1 Tbsp lime juice fresh is best
- 1 cup prepared ranch dressing
Instructions
Slow cook jalapeño popper chicken
- Add chicken, chicken broth, cream cheese, chopped jalapeños, garlic powder, salt, cumin and chopped cilantro (if using) to slow cooker. Cover and cook on low for 6-8 hours or on high 3-4 hours.
Shred chicken
- Shred chicken, then return to the slow cooker with the liquid and stir to mix well.
Prepare to bake
- Preheat the oven to 425°F and line a rimmed baking sheet with parchment paper and lightly spray with cooking spray.
Assemble taquitos
- Heat tortillas in the microwave for a few seconds to soften them up (this makes them easier to roll).
- Place about 2 1/2 – 3 Tbsp of the chicken filling in a line on one tortilla. Top with a sprinkle of Monterey jack cheese and a couple of jalapeño slices (if using). Starting with the bottom edge, roll the tortilla up towards the top, rolling it up into a cigar-like log shape.
- Place taquito on prepared baking sheet and repeat with remaining tortillas, filling, and cheese. Lightly spray with cooking spray.
Bake
- Bake for 12-14 minutes until cheese is melted and tortillas begin to brown.
- If you'd prefer a crispier taquito, broil them for a couple of minutes, just be careful not to let them burn.
Make avocado cilantro ranch
- While the taquitos are baking, add avocado, cilantro, lime juice, and ranch dressing to a food processor or blender and blend until smooth.
Serve
- Serve garnished with minced cilantro, diced avocado and avocado cilantro ranch dressing if desired.
Want to save this recipe for later? Click the heart in the bottom right corner to save to your own recipe box!
Chef Tips
- Recipe makes 16 taquitos (and could probably make a bit more, you’d just need more tortillas), and serves approximately 4 people (with each person having 4 taquitos).
- Original recipe called for water, which I like to replace with reduced sodium chicken broth, as reflected in this updated recipe.
- Corn tortillas can be used in place of flour.
- Chicken filling could probably be cooked in the Instant Pot, I just haven’t tested it to tell you the specific cook time. If you experiment, let me know how it goes!
Even Crispier Taquitos:
- Assemble taquitos as directed.
- Bake in a 450°F oven, for 9-10 minutes. Flip taquitos over and bake another 3-5 minutes until golden brown.
Frying Directions:
- Assemble taquitos as directed.
- Heat about 1/2 – 1 inch of vegetable, canola, avocado, or peanut oil in a large deep skillet, over MED heat.
- While the oil is heating up, add some paper towels to a baking sheet and top that with a wire cooling rack. Set this relatively near your stove.
- Test the oil by either using a candy/frying thermometer (you’re looking for 350°F), or tearing off a small piece of a flour tortilla and adding it to the oil.
- If the tortilla sinks to the bottom and doesn’t bubble, the oil isn’t ready yet. If it gets golden brown really quickly, the oil is too hot.
- When the oil is ready, add 4-5 taquitos at a time into the hot oil, seam side down. Fry for about 1 1/2 minutes per side, or 3 minutes total, until golden brown and crispy.
- Set aside on the cooling rack and repeat with any remaining taquitos.
Air Fryer Directions:
- Assemble taquitos as directed.
- Air fry in a single layer at 400°F for about 12 minutes, turning over halfway through.
- If your air fryer basket won’t fit all 12 in a single layer without overcrowding, split the cooking process up into 2 batches.
Nutrition Disclaimer
The Chunky Chef is not a dietician or nutritionist, and any nutritional information shared is an estimate. If calorie count and other nutritional values are important to you, we recommend running the ingredients through whichever online nutritional calculator you prefer. Calories can vary quite a bit depending on which brands were used.
Recipe adapted from Le Creme de la Crumb





Jill says
This was very, very good!
Katie says
Could the filling be made in an instant pot?
The Chunky Chef says
I’m sure it could, but I haven’t tested it to share specific pressure cooking times or if any changes would need to be made. If you do some experimenting, I’d love to know how it turns out 🙂
Jill says
Super easy and super good!
Juliane says
This is undeniably good!
Sandra says
This is such a great appetizer! The combination of spicy peppers and cream cheese is amazing!
Erin says
Looks incredibly delicious! Everyone would love this!
Beth says
This is one of my favorite recipes on your site. It combines two of my favorite foods!
Stephanie says
I seriously couldn’t stop eating the chicken straight from the crock pot. So good!!
Crystal says
I’m new to your blog, but I love it. My favorite thing s your slide serving scale, I’m cooking mostly for 2 but it’s awesome that I can change the serving size. I can’t wait to try some of your yummy take on some of my favorite things. I’m so glad I found you.
Mikaella Jarrett says
Omg this dish is sooooooo delish 🙂 I loved it.. I subd the cilantro for jalapeños instead when making the sauce only cause my son says jalapeño slices are too hot for him… overall the hubby said this is definitely a dish we will put on our list of family favorites! Thank you
The Chunky Chef says
Hi Mikaella 🙂 I’m SO happy to hear that you all loved these!!
Jessica @ Together As Family says
Hey! I saw these on your Facebook page. Your pictures are seriously incredible! Two of my favorite food things are jalapeno and taquitos. Pinning and making 🙂 Have a great week.
The Chunky Chef says
Hey Jessica! Thank you SO much! I hope you love these as much as we do 😀
Suchitra says
I like the ” look like a rockstar in the kitchen ” part! Awesome easy taquitos! Thanks for sharing!
The Chunky Chef says
Thank you so much!! Don’t you just love those kind of recipes… minimal effort and great presentation 😀
mila furman says
These look AWESOME!!!! Thanks so much for sharing them with us at FoodieFriDIY! They are in my list of faves for the week!
The Chunky Chef says
Thank you so much!! They’re so yummy 🙂
Lynn says
These were definitely a hit thx for sharing